Fortunately, they already used a plugin we also use called Yoast SEO, which is a fantastic extension plugin for WordPress that we have extensive experience with. Sitemaps are used by Google Search Console to guarantee Google crawls your website for suitable content, often boosting your SEO and putting you higher in search results! This simple guide will show you how to export your own sitemap, and upload it to Google’s Search Console.
1: Open Yoast SEO’s General Options
This can be found under ‘SEO’ in the WordPress dashboard, generally further down towards the bottom of your left-hand WordPress menu.
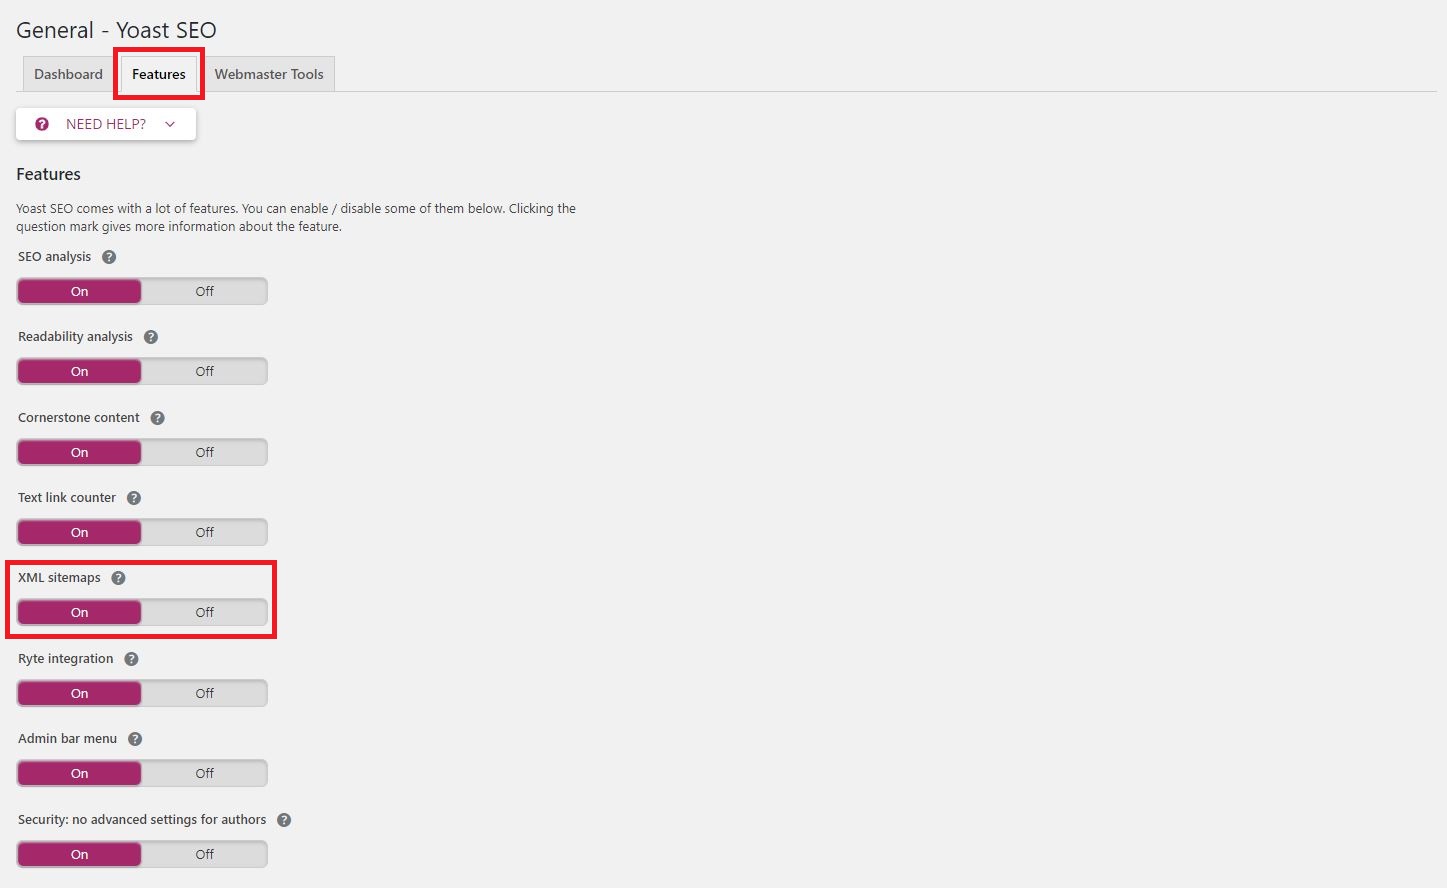
2: Configure Yoast’s Features
At the top of the screen, click the Features tab. From here, you’ll want to go down about halfway, and ensure ‘XML Sitemaps‘ is toggled on. From there, click the ? next to its title, and in the text that pops up, click ‘see the XML sitemap‘, or navigate to yourdomain/sitemap_index.xml
3: Linking Sitemap with Google
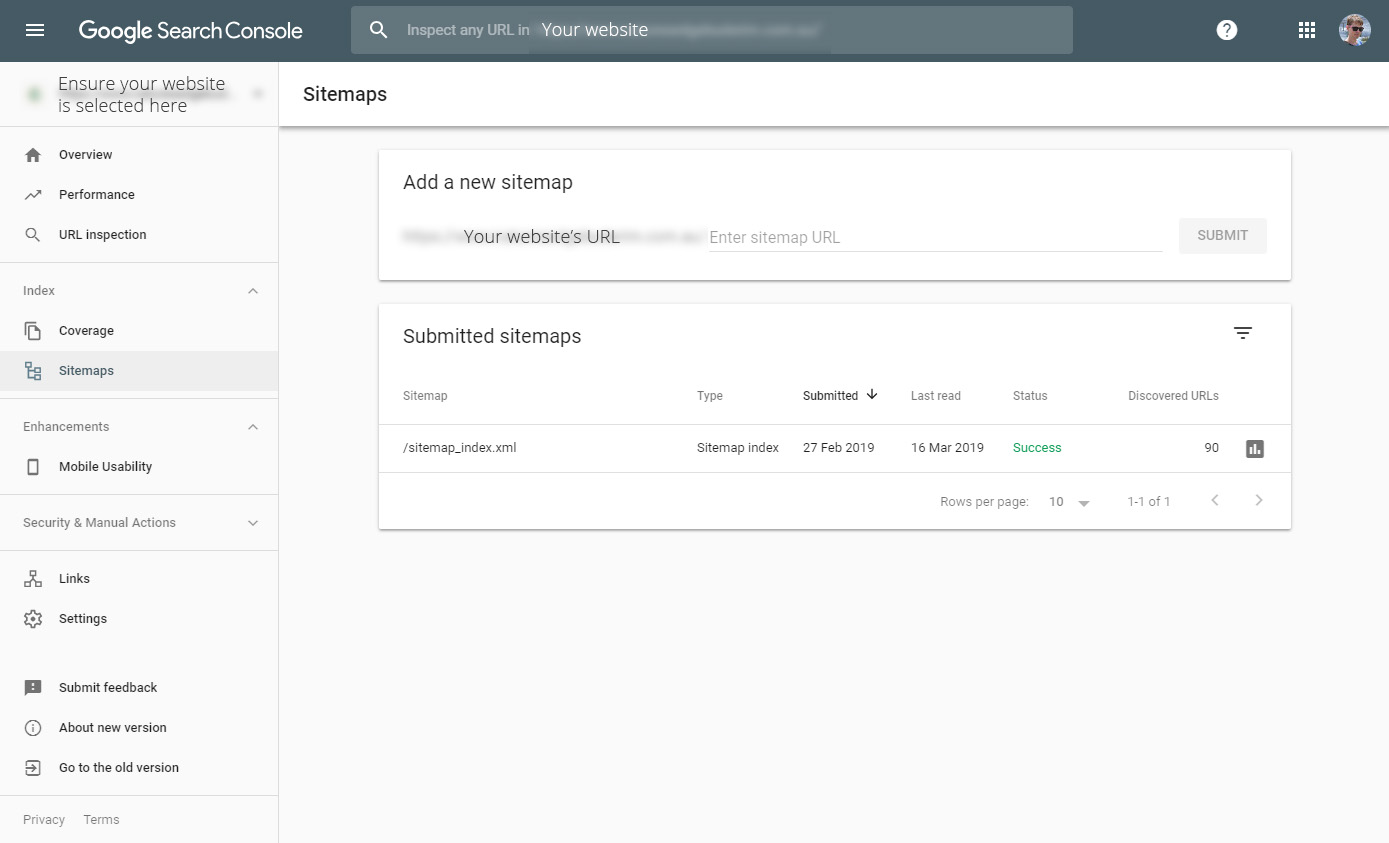
Google has made this process really simple. Assuming you already have the website added to Google Search Console as a Property (and if not, this handy guide will run you through that), with your website selected at the top left, you’ll want to go to Sitemaps on the left-hand menu, and in this screen, enter the sitemap’s URL. Following from Step 2, this is generally as simple as adding ‘sitemap_index.xml‘ to the empty text area!
3: Wait for propagation
This step takes the longest, as we had to wait a few hours for Discovered URLs to go above zero. After we came back to check, the number had climbed. If there’s any issues with the initial indexing, or if there’s any issues with page content down the track, Google will let you know via email (in one case, a client’s own website had content spillover).
If you get errors and/or aren’t sure how to proceed, get in contact with us, and we can assist you!


